


Diving into a JavaScript framework can be a daunting task. With an overwhelming amount of frameworks how do you choose? React, Vue, Svelte, AngularJS, etc.? The list goes on.
In this article, I will break down the following items:
- Why I chose React
- Getting setup with React
- React fundamentals
- A walkthrough of a React example
Here is the link to the Github repo if you want to check out the code for yourself. github.com/lukenetti3/react-intro-blog
After you follow this tutorial, I encourage you to clone this and play around with it. Messing around with the code will help you learn.
Why React
When choosing a JavaScript framework, it all comes down to application. There are a few reasons why you might choose one framework over another.
- Popularity
- Specific features
- Level of difficulty
When I look for a framework, I choose one based on need. Since I am looking to get a job as a web developer, this weighed heavily on my decision. With this goal in mind, React was an easy choice. I knew it was in high demand and was on dozens of applications.
For you, that might look different. Maybe you are looking for specific features, and Vue.js is appealing. Or you are looking for something with great support, then React is the way to go. It comes down to what you are looking for personally. I recommend taking some time to explore features and watching a basic tutorial of a couple of frameworks. It will give you a good idea of what makes sense to you.
Getting Setup
I am not going into too much detail here as there are many options, and I want to introduce you to React and what it can do. I would suggest checking out create-react-app.
This article provides information for getting setup with React: reactjs.org/docs/create-a-new-react-app.html
If you are looking to use a static site generator, you could also check out GatsbyJS (gatsbyjs.com) or Next.js (nextjs.org). Gatsby has excellent documentation and can be a place for learning React right from the get-go.
Once you have the environment setup, you can start using React!
React Fundamentals
There are many benefits to React. I will discuss a few of the basic concepts here and provide an introduction to this framework.
- Components
- JSX
- Props
Components
Components are reusable pieces of code that are a single JavaScript function, usually within a single file. It makes our code readable and easy to follow. In the return statement of our JavaScript function, we usually return JSX. The JSX is the secret sauce!
JSX
JSX is a syntax extension for JavaScript that we will use in React a lot. It looks like HTML but has a slightly different syntax. Here is the basic structure of a component with JSX inside of it.
function Title() {
   return <h1>This is a Title component</h1>
}
It looks like a regular JavaScript function, but we can return what looks like HTML. This is super cool! 🔥
Props
Props(short for properties) are a way for us to pass data from one component to another. Be aware that these properties are read-only.
By doing this, we can pass data from component to component easily. For example, maybe you query your database for the latest blog posts in your main app. From there, you pass the data as a prop to a blog component and style it however you like. You will use props every time you pass data around.
What We Will Build
Now we can take some of these things we learned about React and apply them to a small application. This application is to provide an example of how things work in React. In the end, I will discuss how we can take these concepts and build a more realistic project.
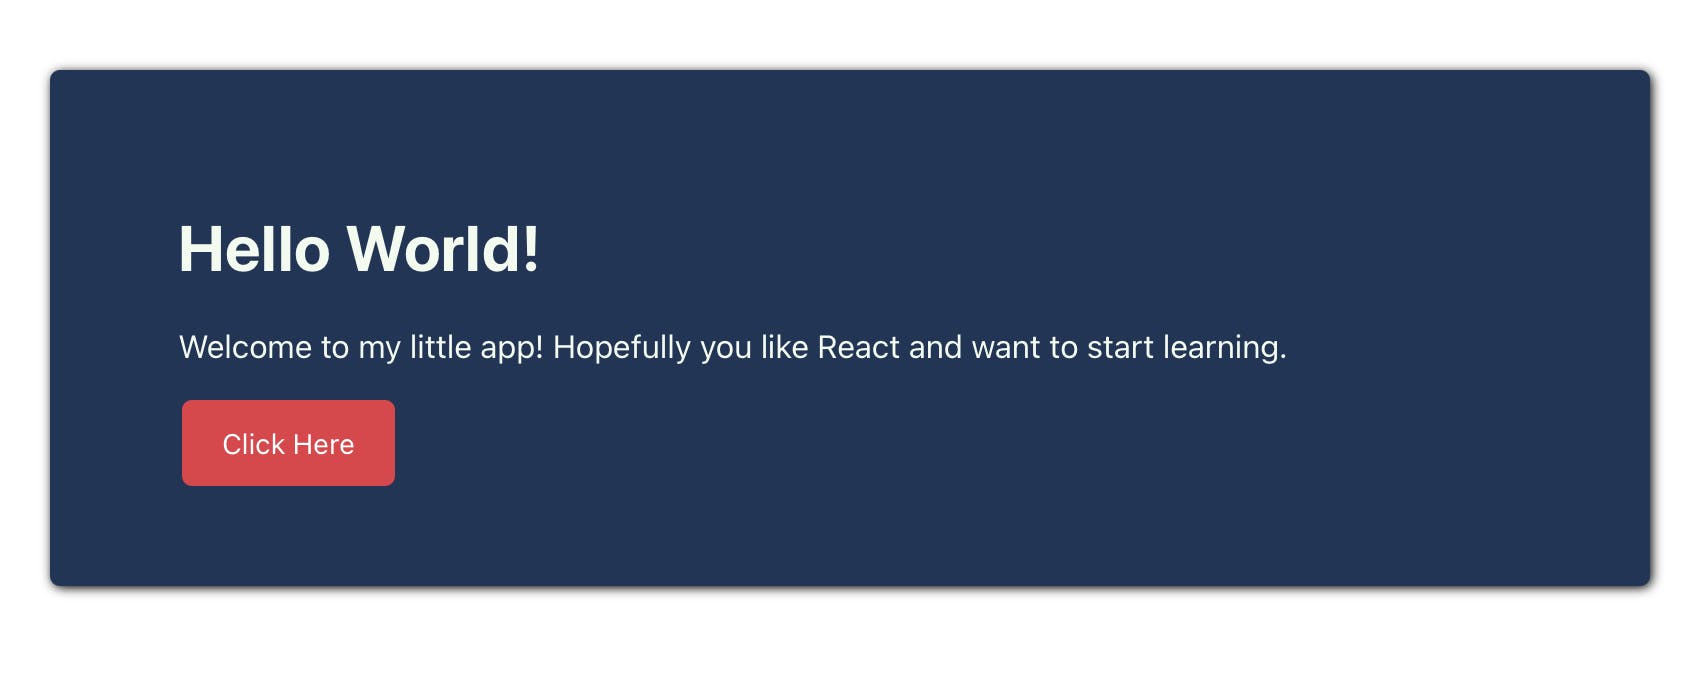
Since this is a basic introduction to React, I will assume you haven't ever seen React code. We will build a simple header section with a heading, paragraph, and button. It will look like this 👇
Note: See Github for CSS
React Example
Below you can see the App.js file for our application above.
import Button from "./components/Button"

function App() {
  return (
    <div className='App'>
      <div className='container'>
        <h1>Hello World!</h1>
        <p>
          Welcome to my little app! Hopefully you like React and want to start
          learning.
        </p>
        <Button link='https://google.com' name='Click Here' />
      </div>
    </div>
  )
}

export default App
First off, we import our Button component. It will be the only component we use today. What's cool is that we can write what looks like regular HTML inside of our JavaScript component. It keeps the code clean and makes it extremely readable!
When we call our Button component, we pass it two props. I have decided to call these two props link and name. You can name your props anything you like. By using props we can re-use our Button many times and provide a unique link and name each time we call it.
Next, we have the actual Button component.
const Button = (props) => (
  <div>
    <button>
      <a href={props.link}>{props.name}</a>
    </button>
  </div>
)

export default Button
We access this data by taking in props to our component. If you console log props, you would see an object with properties link and name. We can now dynamically fill our Button with the proper link and name property.
What makes this cool is how we can re-use this component. We create a styled component button with background colors, shadows, and other CSS properties attached. We can then call it in our app and provide it the data it needs.
Big Picture
I hope you can see how this could apply to websites or even web applications. The ability to break our application into reusable components makes everything more readable and easier to follow. With props, we can pass data around and use it in our components.
Here is how we could use this in a portfolio style website where you have a list of projects. For this example, assume the data is in a CMS. The CMS contains data like the following.
data = [
   image,
   title,
   description
]
We start by querying the data inside our home page. We create a single Project component that takes in props titled image, title, and description. We can use the JavaScript map function to map over all of our projects. Inside the map function, we call our Project component and pass it the data for that project.
I have done this exact thing on my website(lukenetti.com) in the projects section. It is an awesome feature. We can dynamically have as many projects as we want and it will always map through every project and create the same project styles defined in our Project component.
Conclusion
By now we have seen some cool features that React offers. We applied it to a small application and even discussed how this can be scaled up to something bigger as well.
I hope you enjoyed learning about React and if you have any questions leave them in the comments below!
If you want to see more stuff like this follow me on Twitter where I share my journey learning web development and tips I have found along the way.